Wednesday, July 10, 2013

Modified Kentwood Bookcase

A couple of days ago I showed the last table and bench I made for some newlyweds.  The husband also wanted a bookshelf for his office, and I got to build that, too!

We chose to use Ana White’s Kentwood Bookcase plans, although of course I always make some modifications!

bookcase 005

My version is both taller and wider—approximately 72” tall and 32” wide.

bookcase 004

That allowed me to have five shelves rather than four, and I made them adjustable!  For that I had to buy a new toy—the Kreg Shelf Pin Jig, and it worked great.

bookcase 002

I love the look of the planked back for this book shelf!

bookcase 007

The stain is a custom mix of Minwax Weathered Oak and Early American.  I think of it as a “champagne” color—it’s very soft and not at all orange-y.

It was fun to be building again!

*********************

Linking up here:

Domestically Speaking Elizabeth & Co.
Primitive & Proper Thrifty Décor Chick
Friday Remodelaholic Inspiration Exchange
My Simple Home Life’s Simple Creations Friday Miss Mustard Seed’s Furniture Feature Friday
Funky Junk’s Saturday Night Special The DIY Show Off
Beyond the Picket Fence Coastal Charm
Knick of Time
My Uncommon Slice of Suburbia
Perfectly Imperfect Sawdust Throwdown
Common Ground My Repurposed Life
From My Front Porch to Yours A Little Knick Knack
The Scoop!
No Minimalist Here

Monday, July 8, 2013

The Other Solomon Table & a Bench

After my table-building frenzy this spring, I’ve been in a bit of a dry spell.  Too many other projects going on, although I have a couple more tables in my head that are dying to come out!

Last week, though, I built a bookcase for one of the couples who bought a table from me, and I realized I never showed off their table, so here it is!

Red Hen Home Solomon Table 11

This table is a slightly smaller version of the Solomon table I built for myself

You can see the details of the brackets I cut for each corner.

Red Hen Home Solomon Table 3

I love the look of my doily runner on the wood!

Red Hen Home Solomon Table 5

They wanted a bench for one side of their table, and we chose to do a modified version of Ana White’s Providence Bench

Red Hen Home Solomon Table 9Red Hen Home Solomon Table 12

This one has a top made out of 3/4” thick boards to match the table top.

They sent a picture of how it looks in their new home…I love that!

Red Hen Home Solomon Table 14

I’ll share their new bookcase in a couple of days!

*********************

Linking up here:

Domestically Speaking Elizabeth & Co.
Primitive & Proper Thrifty Décor Chick
Friday Remodelaholic Inspiration Exchange
My Simple Home Life’s Simple Creations Friday Miss Mustard Seed’s Furniture Feature Friday
Funky Junk’s Saturday Night Special The DIY Show Off
Beyond the Picket Fence Coastal Charm
Knick of Time
My Uncommon Slice of Suburbia
Perfectly Imperfect Sawdust Throwdown
Common Ground My Repurposed Life
From My Front Porch to Yours A Little Knick Knack
The Scoop!
No Minimalist Here

Wednesday, July 3, 2013

Gumball Terrarium

Red Hen Home Gumball Terrarium 9

Once upon a time I found a treasure at Goodwill.  A red metal gumball machine (a reproduction, not a vintage one), and it liked me and needed to come home with me. 
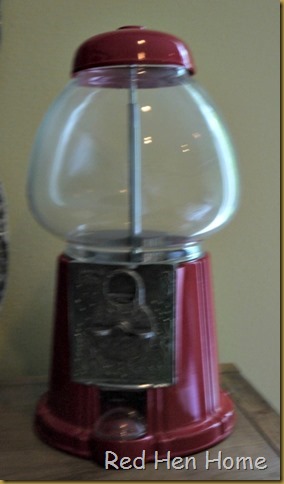
Red Hen Home gumball machine

It came home and sat in my closet for a month or two, until I started redoing my son’s room with accents of red.  You may have seen it on his dresser, although nothing was in it!

Red Hen Home Handbuilt Bedroom Dresser 5

I don’t know how it happened, but one day inspiration struck!  I swear I heard a whisper on the wind…"I want to be a terrarium!”

When I was a little girl, my mother had a terrarium that was one of those big glass jars turned on it’s side and made to look like a pig.  I used to think it was so cool!  But a gumball machine…even cooler!

I started by taking everything apart.  At that point I was committed, because I couldn’t remember how to put it back together.

Red Hen Home Gumball Terrarium 1

I raided my kitchen cupboards for something with which to make a waterproof bottom.  The likely candidates:

Red Hen Home Gumball Terrarium 2

The whipped topping container won out!  I cut it down, drilled a hole in the middle, and squished it into the bottom of the gumball machine.

Red Hen Home Gumball Terrarium 3

I used waterproof silicone sealer to seal the edges and the hole in the middle.

Next step was to fill it up!  I put a layer of small gravel on the bottom, followed by activated charcoal (apparently it inhibits mold growth and odor—both big pluses in my book).

Red Hen Home Gumball Terrarium 4

Next came the dirt, and the plants!  I searched on the Internet for low-light terrarium plants, and then got some help at a greenhouse to find them.  My son’s room doesn’t get a lot of sun on the best days, and in Seattle, there aren’t that many bright days period

Red Hen Home Gumball Terrarium 11

I could have spent a lot of money on cute little accessories for my my son’s terrarium.  I found all sorts of cute miniatures meant for fairy gardens that wanted to come home with me!

Red Hen Home Gumball Terrarium 8

I limited myself to one small turtle on a rock.  My five-year-old thought he was real, and then she wanted a terrarium of her own!
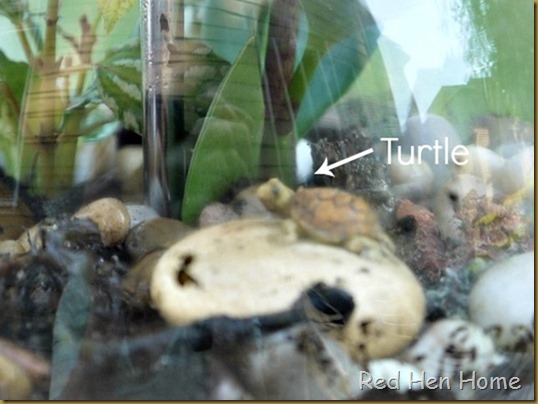
Red Hen Home Gumball Terrarium 10

I think his dresser looks much happier with a touch of green, don’t you?

Red Hen Home Gumball Terrarium 6


*******************************

Linking up here:

Domestically Speaking Elizabeth & Co.
Primitive & Proper Thrifty Décor Chick
Friday Remodelaholic The Scoop!
Funky Junk’s Saturday Night Special The DIY Show Off
Beyond the Picket Fence Coastal Charm
Knick of Time
My Uncommon Slice of Suburbia
Perfectly Imperfect No Minimalist Here
Common Ground My Repurposed Life
From My Front Porch to Yours
A Little Knick Knack

Monday, July 1, 2013

The Handbuilt Bedroom, pt. 6: Drawers

Last night I was visiting with a friend and she told me she had missed seeing anything new on my blog!  It’s been two weeks since I posted last—two weeks of crazy business with lots of projects inside the house.  So it’s not that I lack for things to write about, I just lack motivation to write at the end of the day!

It’s time to get back to “The Handbuilt Bedroom” projects.  You can see the other posts here:

The plan was always to build drawers for the queen-size storage bed, according to Ana White’s plans.  The drawers for the dresser were SUCH a royal pain in the patootie though, that it took me a while to work up the ambition to tackle the project. (You can see the bed frame build here.)

projects 002

Here’s what I learned, though…it is a far, far easier thing to build drawers out of plywood rather than boards.  Far, FAR easier!  Gotta love those nice straight pieces.

2013-05-06 12.28.41

I chose to use 1/2” plywood for my drawers rather than 3/4”.  It’s only a little cheaper, but significantly lighter!

Above you can see my little drawer modification.  Ana White’s drawer plans have you build a four-sided drawer box, and then you end up attaching the drawer front to the box.  It uses a LOT of wood, and your drawer faces are so thick that the bolts that come with the drawer pulls are too short to use without countersinking them.  When building the dresser drawers—I found that incredibly annoying.

So rather than building a double-thick drawer front, I used scrap plywood (and 1x3’s when I ran out of scraps) to build just enough of a short front piece to hold the drawer square.  For the six BIG drawers I built for the bed, it probably saved a half-sheet of plywood.

projects 004

The drawers are not deep back-to-front, but they are VERY deep top-to-bottom!  I lot of people modify them to make them deeper, but in my son’s narrow room it simply didn’t make sense.  He still gained a ton of extra storage.

projects 003

I used 3/8” hobby stock birch to trim out the drawer fronts.  It’s expensive—but so nice that it’s already perfectly smooth and straight!

projects 001

So there you have it…drawers for the Farmhouse Bed.  This is a great bed thanks to Ana White’s terrific plans, and I think it could outlast an earthquake!

*******************************

Linking up here:

Domestically Speaking Elizabeth & Co.
Primitive & Proper Thrifty Décor Chick
Friday Remodelaholic Inspiration Exchange
My Simple Home Life’s Simple Creations Friday Miss Mustard Seed’s Furniture Feature Friday
Funky Junk’s Saturday Night Special The DIY Show Off
Beyond the Picket Fence Coastal Charm
Knick of Time
Mod Vintage Life
My Uncommon Slice of Suburbia
Perfectly Imperfect Sawdust Throwdown
Common Ground My Repurposed Life
From My Front Porch to Yours All Star Block Party
A Little Knick Knack
The Scoop!
No Minimalist Here

Sunday, June 16, 2013

The Handbuilt Bedroom, pt. 5: The Chalkboard

I’m back to post another entry in “The Handbuilt Bedroom” series (you can see the last part here).  With a dresser and a bed, my son was ready for something “fun” for his room…and he wanted a chalkboard.

A big one.

Jacob dresser 007

My son’s room is a little awkward, in that there is very little wall space.  There is a window on one wall, with about 3 feet on either side.  Then there are two blank walls, but the fourth wall has a closet and two other doors that fill most every inch.  With the bed on one wall, that left us with about 10 feet of wall on the opposite side of the room.

Initially he wanted the chalkboard to run the full length of the wall.  However, I didn’t just want to use chalkboard paint on the wall because of the orange-peel texture, so I opted to buy a piece of hardboard to get a smoother finish.  I couldn’t figure out how to “seam” the hardboard and still make it look good, so the poor boy had to be satisfied with a chalkboard that is 8 ft long and 3 1/2 feet tall!

bench chalkboard 017

You can see how I marked the studs on pieces of painter’s tape, and then I used small brads to nail the hardboard directly into the wall.

Then I had to trim it.  Since boards come in 8-foot lengths, and my chalkboard was 8-feet long, I couldn’t do nice mitered corners.  Instead I used 1x3 boards along the edges and cut down some 1x4 boards to make some nice corner blocks.  Everything was painted red and glazed with black stain to match the chest of drawers.

Jacob dresser 010

Of course, the most fun thing to do was to “decorate” it for him before he got home!

Jacob dresser 009

“Cubby” (that’s my boy’s nickname, much to his chagrin") loves his chalkboard! 

AND his mommy!

 Winking smile

Jacob dresser 008


*******************************

Linking up here:

Domestically Speaking Elizabeth & Co.
Primitive & Proper Thrifty Décor Chick
Friday Remodelaholic  
My Simple Home Life’s Simple Creations Friday Miss Mustard Seed’s Furniture Feature Friday
Funky Junk’s Saturday Night Special The DIY Show Off
Beyond the Picket Fence Coastal Charm
Knick of Time
Mod Vintage Life
My Uncommon Slice of Suburbia
Perfectly Imperfect Sawdust Throwdown
Common Ground My Repurposed Life
From My Front Porch to Yours All Star Block Party
A Little Knick Knack
The Scoop!