The morning I found out I had been selected to compete in Crafting with the Stars, I frantically started flipping through the pages of the Ballard Designs catalog I had in my magazine basket, looking for an idea for my “knock-off.”
When I came upon this page…I knew I had my project.

One of my sisters has a super fun family room that is painted black with a filmstrip wallpaper border and several of those cardboard movie-character cut-outs standing around. Knowing that I happened to have her name for our family’s Christmas gift exchange, I decided she needed a little more movie “bling” for her walls!
The cost for this project was about $30, compared to over $300 if you bought all these pieces from Ballard! Here’s what I used:
- One 4’ x 8’ of quarter-inch luaun. Any smooth piece of wood/plywood would do as well.
Clapboard: one piece 11” x 12”; two pieces 1” x 12”
Theatre sign: 30” x 10”
Ticket sign: 12” x 24”
Star: 18” square
Movie reels: 24” square; 18” square; 12” square (two each)
- One 1” diameter dowel
- About 7’ of narrow molding
- Stencils of some sort (I cut mine on a Silhouette)
- Various paint (silver, gold, metallic black, off-white, black, red, tan)
- One binding post
- Miscellaneous screws, painter’s tape, etc.
I cut all of my signs using a table saw or a jigsaw.
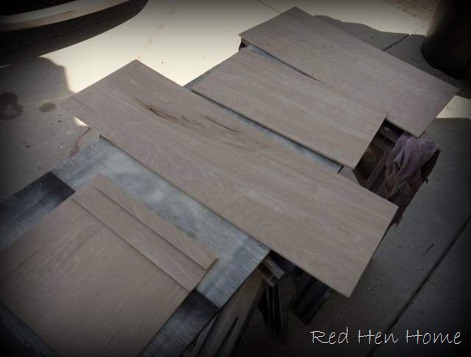
Thankfully I have a very good friend who also has much better tools than I do; at his shop we used a bandsaw to cut out the movie reels. TIP: Use a screw to hold the front and back pieces of the reels together, so you can cut them out at the same time. This can also be done with a jigsaw, but your circles may wobble a little!

Yes, I know this because I cut the largest inner circles of the big reel with a jigsaw (after drilling a pilot hole first so I had a place to start). Forstner bits were used to cut the smaller circles, but they only go so big! So yes, my circles may wobble a bit.
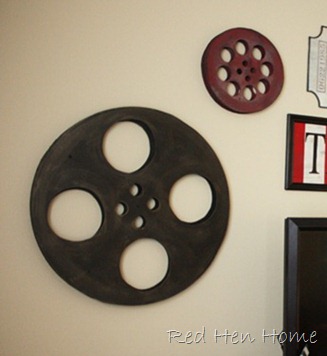
I used layers of paint to give the effect of metal reels. It was fun to play with gold, silver, bronze, etc. to get the look I wanted.
I cut my 1” dowel into one-inch sections to separate the front and back pieces of the reels. There is generally one center piece and three or four pieces around the circumference for stability. I liked the three-dimensional look far better than just a flat circle on the wall!
I designed all my sign lettering on the Silhouette Designer. I used a combination of stenciling (painting in the open space where your lettering should go) and reverse-stenciling (painting over vinyl or cardstock lettering, and then removing that lettering to expose the unpainted surface underneath) to paint all the words on my signs.

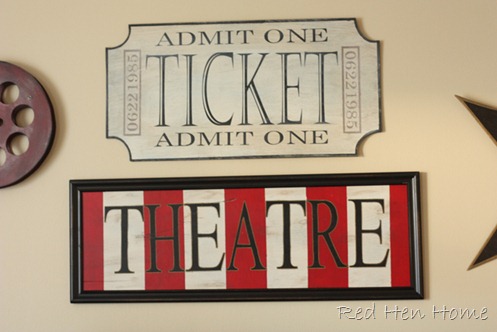
I didn’t use just any numbers on the ticket…I used my sister’s anniversary!

I used painter’s tape to mark off the stripes on the Ticket sign, and I “pounced” the red paint on to get clean lines.

The ticket sign really came together once the curved corners were cut out. I traced around a circle to get the look I wanted, and then I cut the corners out with a jigsaw. I hand-painted the border on as the last step (well…the last step before distressing and glazing, anyway).
I framed the theatre sign with some narrow molding I cut and glued directly to the Theatre board. It should have taken just eight 45-degree angle cuts for the trim…it took me about 17! I was glad I had bought a little extra for “just in case.”
The clapboard was a fun little project. I cut the ends of the two 1”x12” pieces of wood at an angle using a miter saw (a handsaw and a miter box would work just as well). This is necessary so that the clappers will actually open! I taped them together on the back so the angle of those little chevron stripes would match up perfectly.

The bottom of the clapper strip is glued directly to the board; the top strip is attached with a specialty fastener called a “binding post.” I couldn’t find one at Home Depot, but Lowe’s has them (it cost about $0.80).

The star was the brainchild of my tool-handy friend! I printed out a star from my computer, and then I placed the top point of the star at the top center point of my board. Then I used a yardstick to extend the lines on the star onto my board—that way there was no tricky angle-measuring! I cut it out with my jigsaw as well.

It is difficult to tell from the photographs, but the little movie camera is actually on a separate 4” circle that I painted and then glued to the star. Just another way to add dimension and interest to the piece.
Whew! There you have it…the complete theatre room set.

I didn’t wait until Christmas to give my sister her present. I didn’t think it sounded like much fun to read about it on my blog and not get to see it in person! So when I saw her this past weekend, I gave her a “sneak peak” of my Crafting with the Stars post and brought out all the pieces while she was reading.

It was great fun! I think she enjoyed celebrating “Christmas in October.”
I know I did!
Thanks for wading through this very long tutorial with me! ********************************************************
This project featured at House of Hepworths.
*******************************************************
Linking up here and The DIY Show Off.


