This project has been featured on Better After.
***********************************************************
***********************************************************

I didn't always feel that way about Stanley. Here's what I started with:


Six chairs with those gold velvet cushions. I don't know about you, but I am so over gold velvet. (What year were those popular, anyway??) And yes, two of the chairs had broken caning, so I got some more experience at replacing cane! (The story in pictures of that adventure can be seen here.)


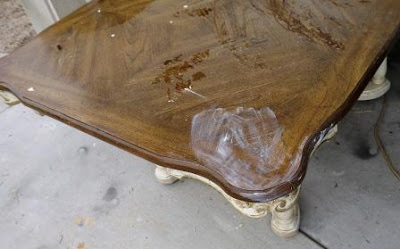
The table definitely had some really pretty details, but you had to look past the brassy gold trim, orange-y table top, the yellowish-white paint, and the black specks! Why was the whole thing covered in black specks? And no, it wasn't an accident...it was really/truly part of the finish.


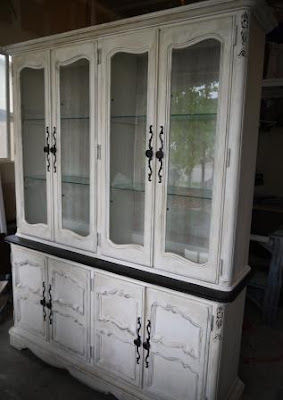
Then there was a buffet and china hutch. Again, the same funky speckled paint job. The hutch doors had some sort of a faux-wire treatment in front of the glass. I've seen chicken wire in hutches that looks pretty cool...somehow it just didn't work with this set. Then the back of the china hutch was covered in a very brassy-gold mottled paper. Not my favorite look.


 I do recognize that it seems a little funny...or snooty...or snotty maybe...to make fun of one shade of white only to choose to paint another shade of white. So be it. At least mine doesn't have funny specks, and it's not all yellow-y! I used Behr Ultra paint in Pillar White. The stain on the table top is Minwax Jacobean--FOUR coats of it! I used some stain to highlight details, as well as Minwax Dark Wax. I did not distress any of these pieces. I tried it on one chair, but I wasn't a fan of the speckled yellowish finish showing through!

The chairs were slipcovered ala Miss Mustard Seed (in fact, the whole makeover was inspired by her beautiful dining room set). Yes, they're made out of drop cloths. I love that stuff. I made miles of box pleats (well, it seemed like miles) to go around all six chairs! I used a narrow irridescent white ribbon on top of a cream-colored grograin ribbon for the ties. When the slipcovers were all done, they seemed a little blah to me...so I painted two random stripes on each seat. Some are centered, some are not! It gave a little pizzazz to the chairs.


Although the buffet top was originally painted, I chose to stain it to match the table instead. If someone chooses to use it by itself, I think it gives it a lot more appeal (that's what I tell myself anyway).


 I covered the back of the hutch with wallpaper that has a subtle white and silvery-gold stripe. I already had it on hand--and when I held it up, it was perfect.
I used all the original hardware. I painted them with Rustoleum ORB spray paint, but they were a little blah, too. So I experimented with Rub-n-Buff for the first time, and I love it! It's glaze for metal! I rubbed a little on the edges of all the pulls, and it gave it a whole different dimension. I'm definitely a fan.

So what do you think of Stanley now?
This set is available for purchase. You can see it at Re-Creations ( 5508 South 1900 West, Roy, UT, or you can e-mail RedHenHome@gmail.com for inquiries.


 |  |  |  | |
 |  |  | ||
 |  |  |  |  |


