Showing posts with label desk. Show all posts

Monday, September 16, 2013

Navy Blue Desk

I’m normally not much of a “blue” person, but every once in a while it just seems like the perfect color!  Case in point…this little desk.

Red Hen Home Navy Desk 2

When I picked it up at a thrift store, it had seen better days.  You can get a little hint of how scratched and faded the top was here…

2013-07-09 10.23.01

It had this little chair sitting with it.  Although they were not really the same style, it fit perfectly, and I kind of liked the contrast of the streamlined desk with the pretty turned legs on the chair.  I didn’t notice until I got home that one of the dowels was missing, but it was an easy fix after drilling out what remained of the old dowel.

2013-08-09 12.00.00

I used the navy blue paint leftover from my office project (Sherwin Williams Naval, BTW).  I had originally planned on staining the top, but it wasn’t cooperative to that idea…ever have a project like that?

Red Hen Home Navy Desk 4

I brightened up the pulls and the metal trim on the legs with some Rub-n-Buff (love that stuff!), and the seat got a bright new fabric.

Red Hen Home Navy Desk 3

I had cherished some hopes that this little desk might actually stay in our office; I imagined it floating in the middle of the room…however, I wasn’t crazy about it when I tried it out.  I don’t think it was big enough to fill the space.

Red Hen Home Navy Desk 1

So it went home with a sweet young woman who was going back to school.  It was fun to enjoy it for a little while!

Thanks to Knick of Time for featuring this project!

***************************

Linking up here:

The Inspiration Exchange Elizabeth & Co.
Primitive & Proper Thrifty Décor Chick
Friday Remodelaholic The Scoop!
Funky Junk’s Saturday Night Special The DIY Show Off
Miss Mustard Seed
Beyond the Picket Fence Coastal Charm
Knick of Time
Domestically Speaking
Perfectly Imperfect No Minimalist Here
Common Ground My Repurposed Life
From My Front Porch to Yours Mod Vintage Life
A Little Knick Knack

Friday, March 15, 2013

Office Progress: The Desk!

I am being so good!  I am posting another office update in less than three weeks’ time!

When last I left you, this is what we were living with in our “office”…

2013 projects 030

…and we lived with it for a few weeks, waiting for our desk to be completed.

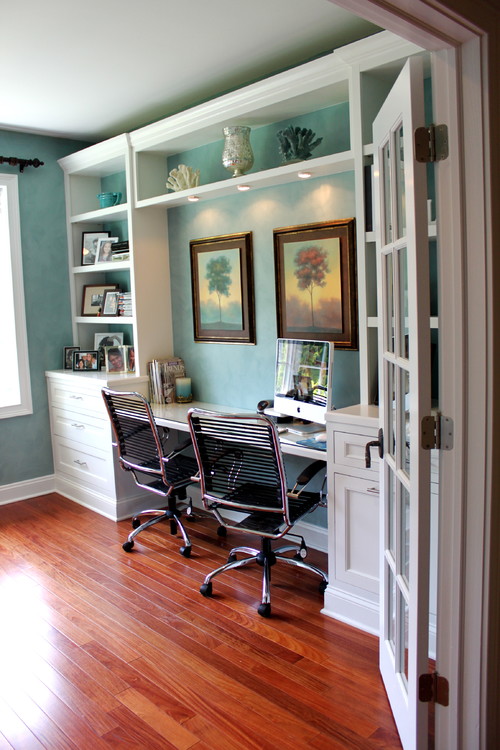
And for a reminder, this was the inspiration photo for our desk:

Houzz Real Life Offices

Oh, it was a happy day when the first pieces arrived!  Due to some scratched paint, it took a while for everything to be delivered.  This piece is the right-side base cabinet.  You can see the decorative venting material on the left side that lets our computer breathe.

2013-03-01 12.43.58

Next a beautiful 6-foot maple desk top was installed…

Red Hen Home desk collage 1

We used a temporary cleat to hold the bridge up…

Red Hen Home desk 4

That was my idea, and I’m very proud of it  Winking smile

Red Hen Home desk 3

It’s coming together!

Red Hen Home office2

Ta-da!

Oh, it’s so pretty.  Even with wires and all (it took another day or so to drill the cord grommets we needed in the desk top).

I love how the bridge is slightly shallower than the shelves on either side.  It gives an interesting depth, but it was murder to cut the crown molding!  Glad I wasn’t the one doing it!

And I stood back and looked at the blue…the yellow…the white….

…and I didn’t like it.

Originally the back of the bookshelves was supposed to be the same light blue as is on the walls, but I chickened out after living with the light blue for a few weeks, and had them painted all white.  I just wasn’t feelin’ the love.

My younger sister was over the night after it was installed, and I made her help me “decorate” the shelves for a couple of hours a little while to see if I would like it better….

Red Hen Home office 1

…and it helped, but not enough.  (No, I didn’t want to drive a nail in my newly painted wall…we were “just playing” with a few things.) 

I finally decided:  something about the blue, the yellow, and the white…reminded me of a baby’s room.

 Not the look I was hoping for.

What’s a girl to do??

***

***

***

***

***

Nothing a little MORE paint can’t fix!

Red Hen Home office navy

Ahh…much better!

Red Hen Home desk 5

…to be continued…

(please forgive the cell phone pictures!  I’ll do better…later)

***************

Desk unit built by Wilson’s Custom Carpentry, serving the Seattle area.

Monday, May 21, 2012

Office Project: The desk!

desk 029

I have no excuses.

It has taken me forever (well, at least a week) to blog about the desk—and for no good reason, other than that it has taken me that long to take and edit a few pictures.  But the time has come…

You can see my concept drawing for the desk here, and the technical drawings here.

It took me two trips to pick up all the pieces of the desk from the talented craftsmen at Sean’s Woodworking in Salt Lake City.   Have I mentioned that it’s NINE FEET wide??  Go big or go home, I say!

They would have been happy to bring it to me and install it for me—but that version is for people who have more money than time (that’s not me).  But never having installed cabinets before, I really didn’t know what I was up against!  So here’s a quick re-cap, if you’re interested.

Because I was going to be installing things myself, they built the upper cabinets with a cleat system, so they could be briefly hung on the wall on a 2x4 until I could screw the cabinets themselves into the wall.  This was a very good thing.  Otherwise, it would have taken a fair amount of juggling and weight-lifting to get everything up and level!

I carefully marked my studs, and first screwed the cleat for the bridge unit into them.  Then I discovered that the cleats for the bookshelves on either end did NOT transverse two studs!  That was not a happy moment, and that’s why the cleat is crooked in the picture!  I ended up using drywall anchors to secure one end of the cleat.

front room to office 002

I prevailed on a neighbor to come help my husband and I lift the bridge unit up onto the cleat—it was heavy!  Then I screwed it into the wall.   The side pieces we could handle on our own!

I posted this “sneak peek” on Facebook the day we were installing it!

front room to office 005

I ran into a few snags on the installation.  This desk is meant to be used for a computer, and so we needed holes for cables/cords to pass through.  When I picked the desk up, I was supposed to have them drilled—but we all forgot.  They assured me I could do it myself, but it was really NOT an easy project.

For example, drilling though the desk top involved drilling through TWO 3/4” pieces of wood, plus a 3/4” piece of MDF!  It took a good 20 minutes to get through all that.
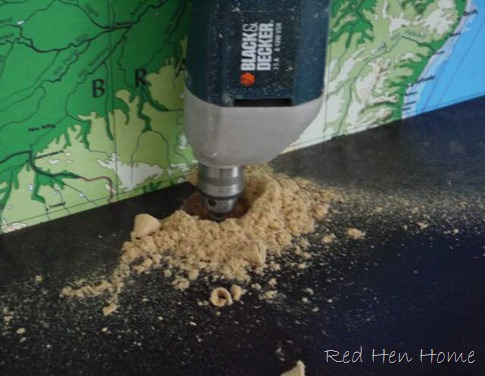
front room to office 009

…but at least I learned that the desk was sturdy!  Yep, I climbed on top of it.  And really—it was easier to do that part than the two holes that had to be drilled in the sides of the cabinets below!

front room to office 013

But drilling the holes was only part of the solution—you see, there are DRAWERS under the counter top, and thus there was no where for the cords to go.

front room to office 006

My solution was to knock off the back of one of the drawers, cut the drawer bottom down my 3 inches, and reattach the back of the drawer.  It was a little hard on the MDF…
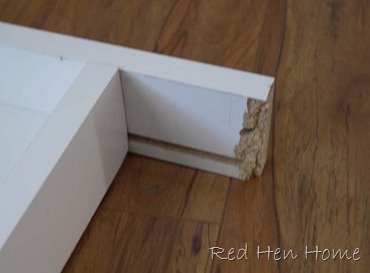
front room to office 008

…and trust me, it was emotionally difficult to break part of a brand-new and expensive desk!

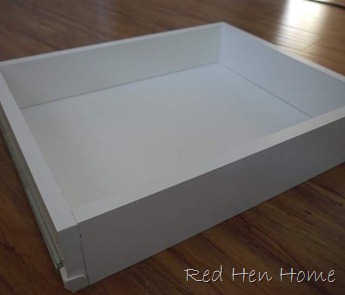
Next problem was due to a bit of a miscommunication, I think.  I requested a pull-out shelf in the right-side cabinet for my printer.  They built me a drawer inside the cabinet:
front room to office 016

The difference was that my printer wouldn’t fit in the drawer!  So I took it out to my table saw and sliced off the top three inches all around—thus creating my own shelf.

front room to office 017

Not so pretty, maybe, but it worked!

So here’s a brief tour of my favorite features:

** My printer is tucked away, with space for paper as well!

desk 022

** The CPU is also tucked away, but in a prettily vented cabinet (I got the idea to use decorative sheet metal from Meridian Road).

desk 024

** I love the upper bridge.  I gave up on seeded glass (it was expensive).  The cabinets look like they open upward, but that’s only because of where the pulls are installed.  Upper hinges are VERY expensive, so this was a great cheat!

desk 027

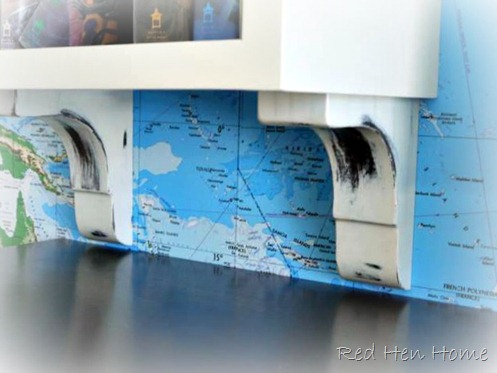
**  I love the corbels under the bookcases, but I will admit that they are not as eye-catching as I hoped they would be.  But I love them because Sheri from Sean’s Woodworking let me come to the shop and help paint and distress them (more on that another time).
desk 025

So there you have it!  It is, without a doubt, the “most major” part of the whole “front-room-to-office” project.  There are still more things to be done in the room—a couple of furniture pieces to finish, and I’d like a rug—but we’re actually using that poor unloved front room now!

desk 020

And I am happy to say that I actually like having the computer there.  It’s easier to keep track of what the children are doing, more convenient for me to use, and best of all…

desk 028

…it’s pretty!

******************************

P.S.  The Map Wall may be found here.

************************

This project has been featured at My Repurposed Life and Primitive & Proper.

***************************

Linking up here:
  Elizabeth & Co.
Sisters of the Wild West No Minimalist Here’s Open House Thursday
Friday Remodelaholic 2805
My Simple Home Life’s Simple Creations Friday Miss Mustard Seed’s Furniture Feature Friday
Funky Junk’s Saturday Night Special The DIY Show Off
Primitive & Proper Thrifty Décor Chick
  My Uncommon Slice of Suburbia
Perfectly Imperfect {Primp}
Simply Klassic Sundays My Repurposed Life
From My Front Porch to Yours It’s So Very Cheri
Cowgirl Up! {aka} design

Tuesday, November 9, 2010

What I got !

I promised to show off what I got in exchange for my Divine Dining Table. I couldn't be happier!

Ta-da!


Isn't she pretty??

I used to have this little table in that spot:

It was fine, but I have since decided that I prefer color in my accessories rather than my furniture.

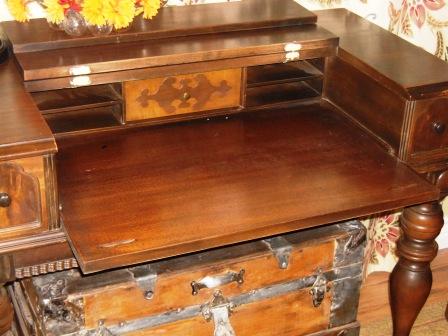
This new-to-me little desk has history! character! It has a slide-out writing surface!


Perfect for a lap-top!

My grandparents' trunk still fits neatly underneath.

I love the top folded back, but it can also close if wanted.


Actually, that part is a little tricky, as the original hinges are broken. I'm on a hunt for new ones, but I haven't had any luck yet.

Other than that, this little desk was in remarkably good shape. There were/are definitely some dings and scratches:

...but I used a little Walnut "Restore-a-Finish" on it, and while it isn't a magical ointment, it does do a pretty good job of hiding minor defects.

Here's one last pretty picture:

I'm so glad it's mine!


HookingupwithHoH

Furniture Feature Fridays

Monday, November 1, 2010

Library Table

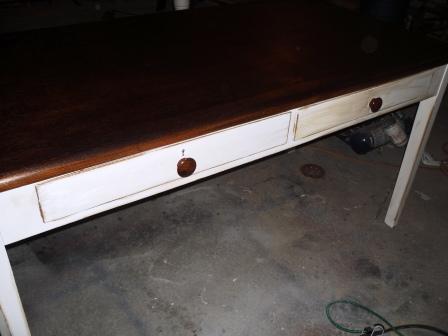
Yes, it's true...I cheated on my furniture diet yet again. I was browsing through Deseret Industries (Utah's own "Goodwill") last week, and I happened upon THIS:

Seriously, what's a girl to do?? I love the look of old library tables...it had to come home with me.

One of the drawers even has a lock! There is no key, but...it's CUTE!


A year ago, when we got rid of my husband's monstrosity of a desk, I looked everywhere for one of these...not luck. Eventually he bought a used IKEA Gallant desk for our basement family room. I cherished the hope that once this one was refinished, he would let me swap his IKEA desk for this one.

No such luck!!
**That man does not understand the concept of "furniture fate"!**
(sob!)


I refinished this desk in my favorite Sherwin Williams Creamy white with a walnut-stained top. (That may have something to do with the fact that I am had half a gallon of paint on hand.)


I kept the original knobs, but stained them darker as well. It gives it more of a "furniture" kind of look, I think...less desk-ish.


I distressed the edges and then glazed the bottom with stain. I used it pretty heavily on the corners and edges where I did the most distressing.


I'm sorry these aren't very pretty pictures. It would not be an easy piece to move into the house!

Goodbye, dear desk...you will be missed!

What about you? Do you understand the concept of "furniture fate"??


HookingupwithHoH


A Little Knick Knack
Furniture Feature FridaysFunky Junk's Sat Nite Special